It helps to create the standard admin account when you first unpack the computer and add user accounts later. If you already have user accounts, add the admin user account now and consider changing user accounts to Standard.
Creating a standardized admin user account
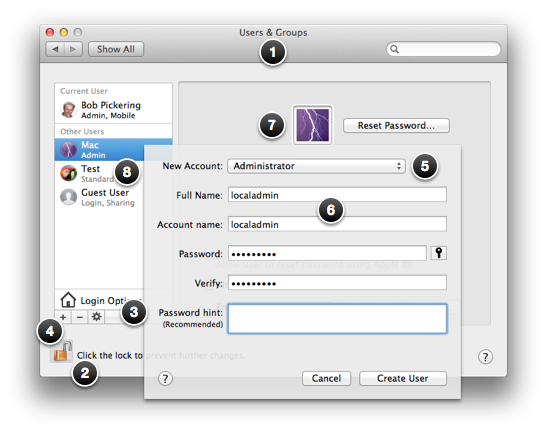
- Open System Preferences and click Users & Groups.
- Click the lock and authenticate as an existing administrator.
- Click Login Options and disable automatic login.
- Add a new account.
- Set the account type to Administrator.
- Enter a standardized account name (such as localadmin) and password you'll use on all computers.
- Change the icon to a standardized icon so it's easy to recognize on all workstations.
- Optional: Select existing user accounts and change them to Standard so users cannot override settings.
Setting remote management options
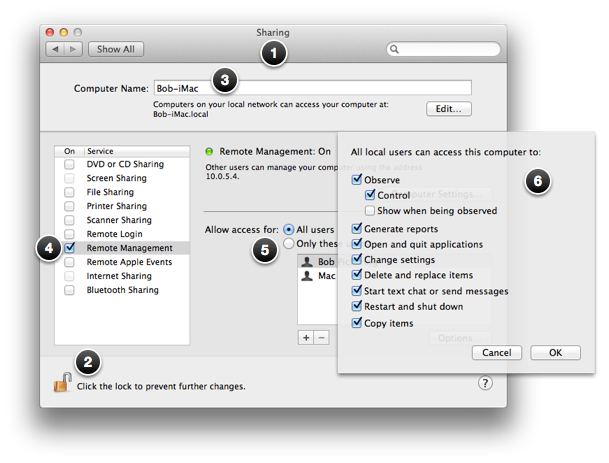
- Open System Preferences and click Sharing.
- Click the lock and authenticate as an existing administrator.
- Set Sharing name to user’s first name, a hyphen and the model (e.g., Bob-iMac).
- Check the box for Remote Management.
- Allow access for the administrator user.
- Click Options and check all boxes except Show when being observed.
Setting Energy Saver options
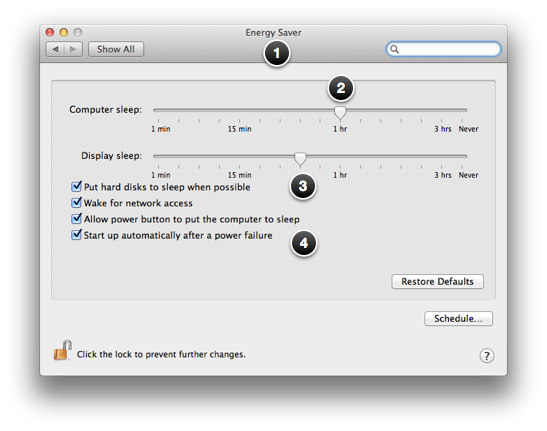
- Open System Preferences and click Energy Saver.
- Set computer sleep to 1 hour.
- Set display sleep to 30 minutes.
- Check wake for network access and start up automatically after a power failure.
Learn more about Remote Desktop.