A disk image is a special file that contains all the data on a disc, including invisible files and file permissions. Double-click a disk image and it mounts a virtual disk on your Mac. The computer treats it as if it were an actual disk. In the post-disc world, software downloads are often supplied as a disk image. Learn how to install software from a disc image.
![]()
You can create your own disk images from actual discs, then store the images on a hard disk or shared drive. This is especially helpful if some of your Macs don't have DVD drives. And disk images can be burned back to media anytime, so they are useful when you want to make an exact copy of a disc.
Making a disk image from a disc
- Insert the original disc.
- Click the Launchpad, or click the Finder (desktop), then the Go menu at the top of the screen and choose Utilities.
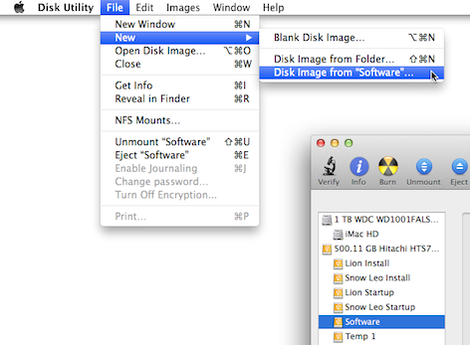
- Open Disk Utility.
- Select the disk in the left sidebar.
- Click the File menu and choose New-Disk Image from [name of disc]
- For image format, choose DVD/CD master option.
- Choose a location (such as desktop) and save the disk image.
Burning a disc from a disk image
Sometimes you need to do the reverse: make a disc from a disk image and send it to someone else.
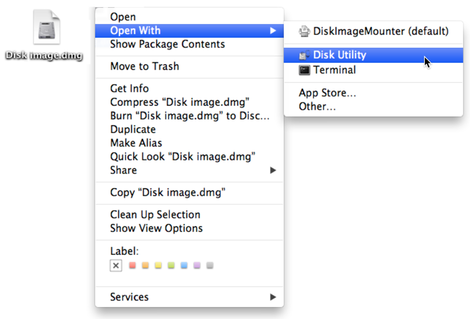
- Click the Finder (desktop). Right (or control)-click on a disk image icon.
- Choose Open With and Disk Utility.
- Select the disk image in the left sidebar and click the Burn button.
- Insert a blank disc and burn the disc.
- Now you can copy the disk image to a flash drive or shared drive for use on other Macs.
Burning discs
It’s easy to make your own CDs and DVDs. Here we’ll focus on computer discs – documents, applications, etc. See special instructions for copying movie DVDs.
Burning CDs & DVDs of your files
- Insert a blank disc. If asked, choose to open the Finder.
- The disc mounts on the desktop like any other disk.
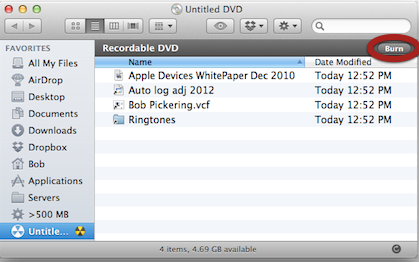
- Drag files or folders to the disk icon.
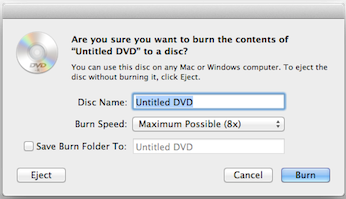
- Click Burn or eject the disc.
Burning multiple copies of a disc

A burn folder works just like a real disc but doesn’t burn until you’re ready. The folder remembers the files you’ve chosen even after the burn in case you want to make another disc later. The contents of the burn folder are really aliases (shortcuts), so you can safely delete a burn folder anytime without losing the original files.
Using a burn folder
- In the Finder (desktop), click the File menu and choose New Burn Folder.
- Drag files or folders to the folder.
- When you’re ready to make the disc, click Burn and insert a disc.
- You can keep the burn folder and change its contents.
- Open the folder and click Burn again to make another disc.
Learn more about transferring files and backup.